–Grant M.
Despite what one of my dear, but simple-minded coworkers might say, the work that we perform as writing tutors has a lot in common with the wondrous outdoor sport known as disc golf. This game functions similarly to its (older, dumber, and overall less worthwhile) cousin, ball golf. A player throws a disc from a starting point (the tee) towards a chain-link basket (the “hole”). The goal is to land your disc inside of the basket in as few throws as possible.

Yes, despite what this less-astute coworker might say, disc golf (or as he likes to refer to it, “frisbee basketball”) is a game that demands precise knowledge of the tools available to you as well as a healthy dose of patient practice. What’s that? It sounds like disc golf requires exactly the same skills as tutoring writing? It doesn’t sound at all like I am manipulating the topic to prove a point? We should start having our weekly tutor meetings out on the disc golf course?
All excellent thoughts!! I wholeheartedly agree!
So with that out of the way, let’s take a look at the different tools that can be found in a disc golfer’s toolbox.
The Disc Golfer’s Toolbox
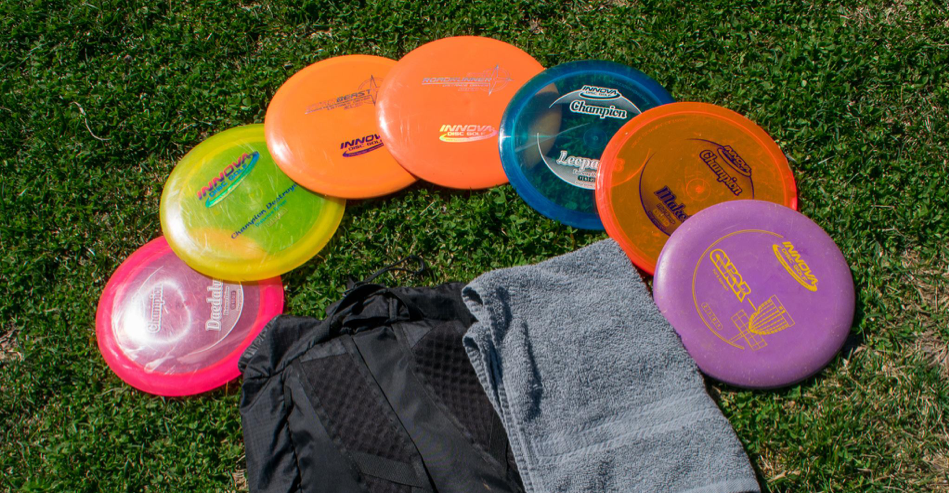
In disc golf, players use a wide variety of discs depending on what type of throw they are attempting to perform. The main types of throws can be sorted loosely into drives, mid-ranges, and approaches/putts. Each type of throw requires a different type of disc, which is why players often carry between 5 and 10 discs with them when they play. I personally bring a bag of 7 discs consisting of 3 drivers, 2 mid-range, 1 approach, and 1 putter. I also always pack a towel for when my discs land in puddles. (As a brief aside, the ground in Asheville has not been dry in approximately 5 months. My working hypothesis is that this region is well on its way to becoming the 6th ocean on our planet. What a fun and exciting time to live in Western North Carolina!)
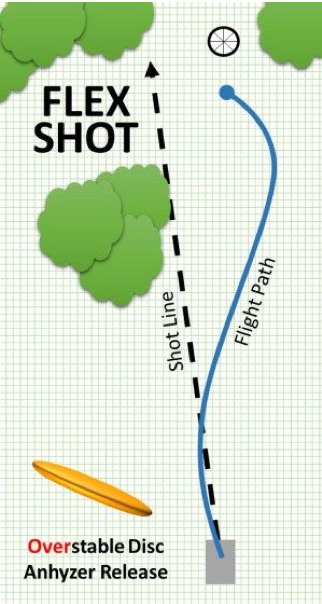
Anyway, the disc that I choose to throw depends on the type of throw that I am trying to create. For example, one of my favorite throw types is the “flex shot.” This particular type of throw is incredibly useful for navigating through trees. A good flex shot, for me, will drift towards the right for about 150-200 feet before leveling out and banking hard to the left for final 50-100 feet of the flight. To achieve this, I know to use my Destroyer (the 2nd disc from the left).
On the other hand, if my drive lands on an open fairway around 30-100 feet from the basket, I know to use my Mako3 (2nd disc from the right). This disc flies almost completely straight, making it ideal for open approaches.
The point is this: The need to be familiar with your Disc Golfer’s Toolbox out on the course is no different than the need to be familiar with your Tutor’s Toolbox at the writing center.
The Tutor’s Toolbox
So if a Disc Golf Toolbox is comprised of discs, what then does a Tutor’s Toolbox consist of? Simple, all of the little practical techniques that a tutor uses during sessions to help shape better writers. I personally have a few go-to techniques, but I always try to stay conscious of whether or not they are the *right* tool to use in any given situation.
Here are my favorite 3 tools to use in my sessions:
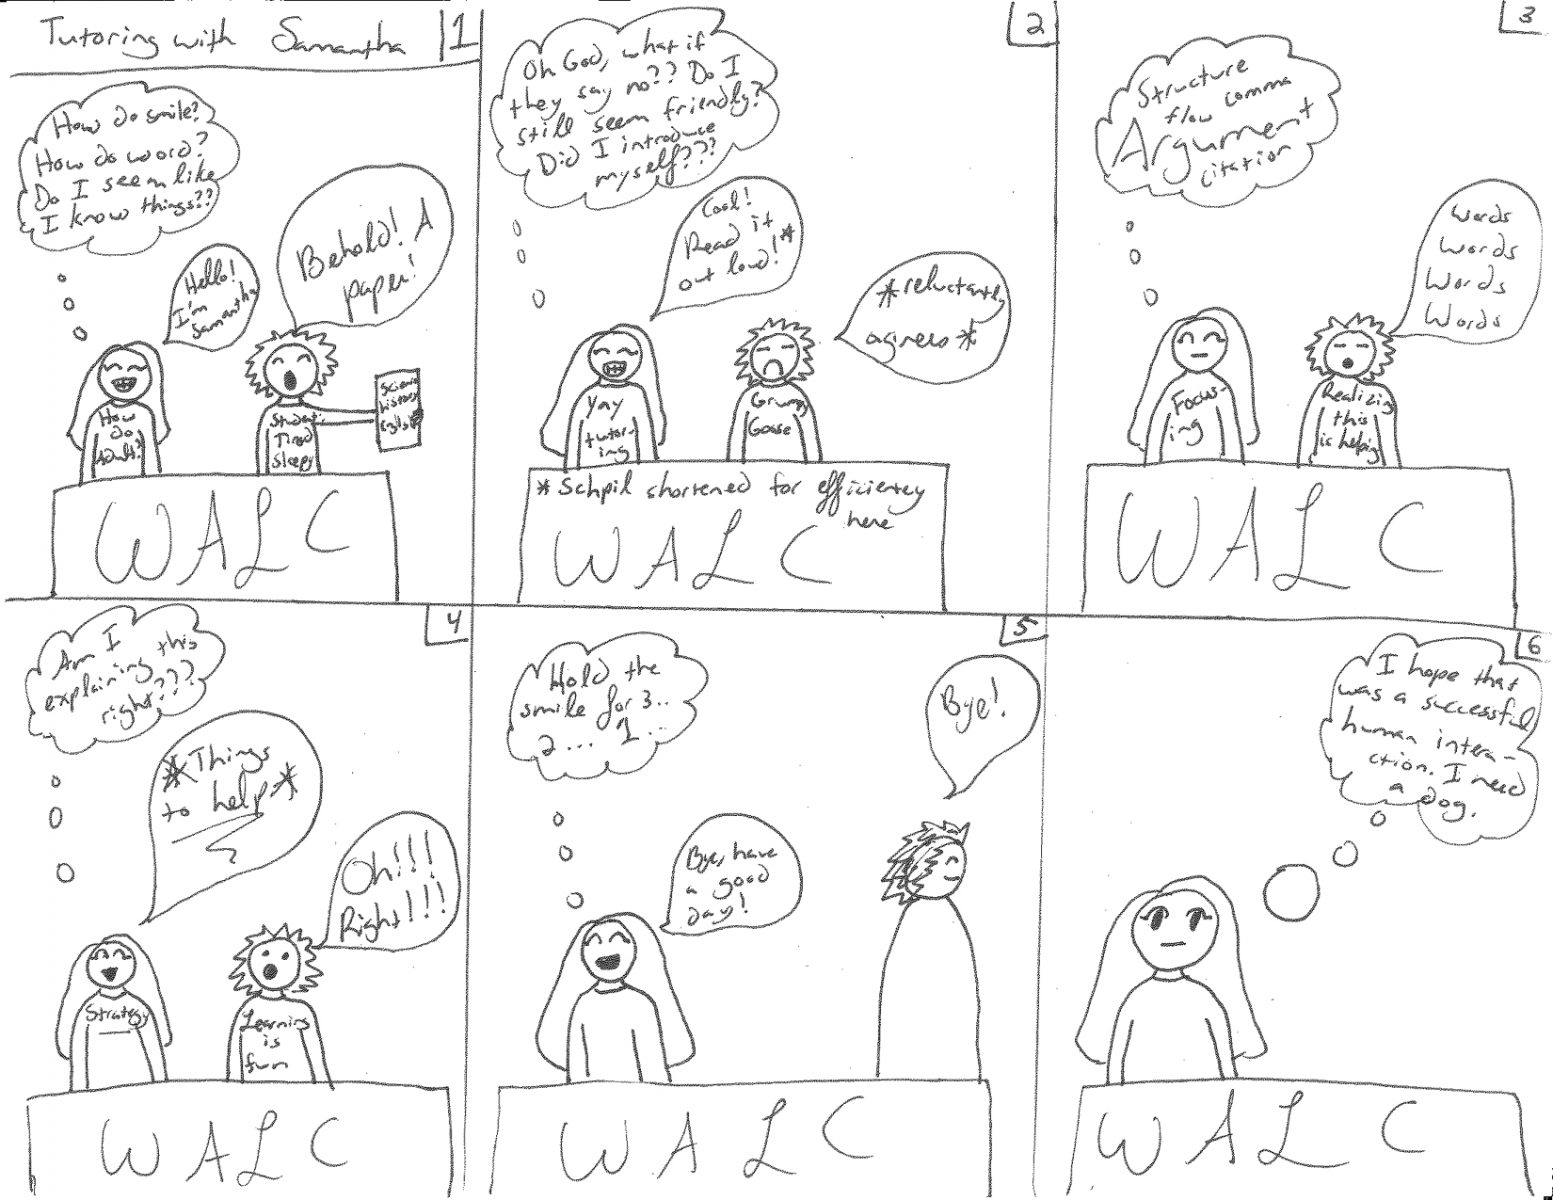
1. “What I’m hearing you say is …”
This technique is the bread and butter of my Tutor’s Toolbox. I use this technique at some point in almost every one of my sessions. This is how it works: I ask a student to explain a particular part of his or her paper. I then repeat back to them a summarized version of what I think they are saying. This allows both my student and me to be on the same page.
The next step is to relate what the student just explained to me to their actual paper. Oftentimes, students know what they want to say, but their ideas get tangled up on their way out. Clarity can be lost on the way from the brain to the keyboard. By relating the student’s own verbal explanation to the impression that I got as a reader of their paper, I help the student to see any disconnect between what he or she wants to write and what he or she actually did write.
Students often do know what their ideas are. This tool is one way to help them express these thoughts.
2. Reading Aloud
Reading aloud is a tried and true way to help students get a better feel for their papers. It can help them to see how ideas fit together on a larger scale and how the sentences sound on a smaller scale. Personally, I have a very difficult time processing auditory information, so I rarely start a session by having a student read his or her entire paper aloud. Instead, I often ask the student what the paper is about and read over either the whole thing or parts of it, depending on length.
I mainly use reading aloud to aid in sentence level revision. I use it when I notice a large amount of errors or awkwardly worded sentences. Students generally skim over their own sentences. When a student is forced to read aloud, he or she slows down and takes each word one at a time. This almost always results in the student finding mistakes in the paper.
I will often ask the student to read a couple of paragraphs aloud. If the student is able to identify things like poor coherence or sentence fragments, I will suggest that he or she try doing so for the whole paper, since the student has just demonstrated the effectiveness of the technique. This frees us up to spend the rest of the session on higher order of concern items.
3. Reverse Outline
The reverse outline is a heavy-duty tool that I only break out in dire situations. A reverse outline is when someone takes a draft and extracts the main points on a separate sheet of paper. I usually only do this with a student in cases where the information of the paper lacks paragraph breaks and circles back on previous points frequently. A basic reverse outline will look something like this:
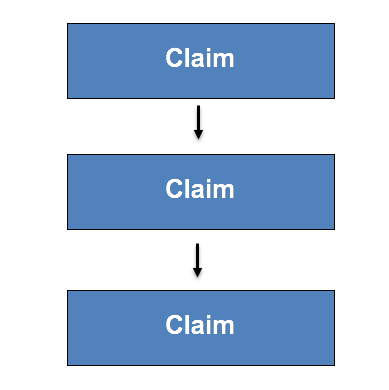
Where each “claim” box represents a unique point made in the paper. By extracting the specific claims made in the paper, a student can better visualize how each point relates to the others. This allows the student to identify where paragraph breaks could be helpful to a reader. It also helps students see if they actually have enough claims to support their theses.
Wrapping Up
In order to use any tool, the tutor must be able to understand the situation and assess if a given technique will be the right one for that student. This can only be learned through practice. Just recently, I had two very different experiences using the reverse outline technique. In one case, the student was able to split his ideas up into specific claims fairly easily. Once he saw them written down, he was able to reorder his points in a way that made more sense while also adding an additional claim to tie things together.
However, the second case did not go nearly as well. The second student also had a paper lacking paragraph breaks. But in this case, once we began to construct a reverse outline, I realized that he really only had one unique claim. The rest of the paper was simply restating the same thing in order to create enough fluff to meet the instructor’s required word count. This session was not as effective because I picked the wrong technique from my toolbox. I used an organizational tool when I should have used a tool for generating more ideas, such as free writing.
Using the wrong tool in a tutoring session with a student is much like picking the wrong disc while out on the course. If you throw a driver at a basket that’s only 10 feet away instead of a putter, chances are you’ll miss your mark and sail way off into some thorn-filled thicket. And if you ask a student to read their paper aloud when they came for help brainstorming, you’ll end up in a thicket of confusion and bad communication. But if you are patient and keep practicing? You’ll be well on your way to having a lively and productive session.